Since posting the video to the internet the kind and helpful people at reddit and YouTube, (sorry that should say, KiNd AnD HElPFuLl) I’ve learned a few things about my installation. So, let me just say that this project isn’t yet completed. In the future, I will be installing a filter at the intake, and I will be replacing the flexible duct with straight duct.
Now that that’s out of the way…
We have lived in this house for 11 years. For the first 10 years we had no ventilation from our kitchen, so every time my wife cooked something that made a lot of smoke we would need to open our windows or face the dreaded False Alarm from the smoke detectors. In the spring of 2021, I installed a vent over the range in our kitchen as part of a larger remodel. The goal was to remove smoke when cooking something like naan or hamburgers. It was not meant to be a grease hood or grease trap. We’ve had the fan in place now for a couple of months. I would guess we’ll run this thing for a few hours every year.
We started with online research. My wife found the flush mount ceiling vents and knew that she wanted something like that. It would clear out the smoke, but not be obtrusive or hang down into the kitchen. The few that we could actually find for sale cost thousands of dollars and/or had to be shipped from Europe. I do think these will become more popular where building code allows.

After a bit more research, I decided that this was a project that I could do. I started making a plan and buying components. Overall, the project took me about four months. There were lots of other projects going on with the remodel, plus we have kids, I work a full-time job, and I’m good at making up excuses. Recording the video added a layer of difficulty as well. Props to full-time YouTubers who do huge projects and top-notch video editing. I know most of the big ones have a team of people to help now, but they started small and that’s not easy.
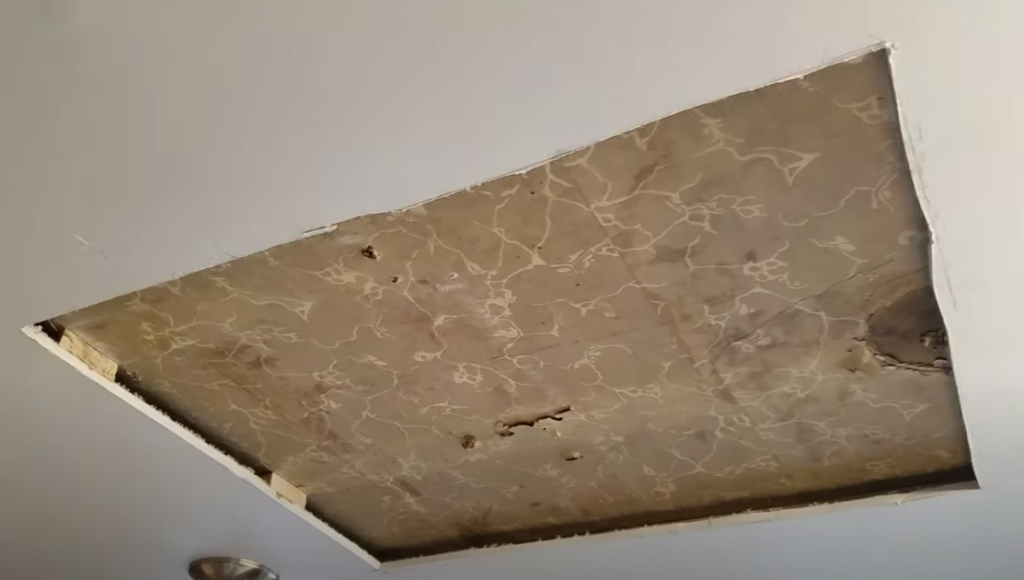
The very first thing I did was measure and cut a hole in the ceiling above the range. I wanted to know what surprises were hiding in the ceiling and get a sense of the size of the pan that I would need to build. I’ve done a little bit of sheet metal work in the past. This was very basic stuff.
I made the pan out of some sheet metal I purchased at my local home center. After laying out all my cut and fold lines I started cutting. I left the outer lip of the pan long so that I would have more metal to grab for bending.

To make the first set of bends I used two pieces of 1.5″ angle iron from the hardware store. I cut them to the longer inside length of the pan. The first bends I made were the shorter inside lengths, then I could put the angle iron inside the pan to make the next set of bends. I bent the corner tabs by hand. I used a smooth-faced hammer to tighten the bends.

I used a sheet metal folding tool for the bends that would make up the lip of the pan. I used a hammer again to help shape the corners. Don’t try to make the whole bend all at once. Start by forming your crease in the metal, then move down the length of the piece to move the remaining metal to match. Repeat this and bend the metal a little at a time for the best results.
To help the pan hold its shape I left tabs in the cutout. I folded these tabs over and then used an awl to puncture the metal. I held a piece of wood behind the metal for support. Then I drilled the holes to the proper size for some rivets. I used just one rivet per corner. That was enough to help the pan hold its shape.

After everything was riveted and secure, I marked the outer edges and cut them down to size. With a little more care it would have been possible to make the outer edges connect with forty-five-degree angles. I decided that wasn’t necessary here, since everything will be hidden when the project is done.
Back to the hole in my ceiling. I used a probe bit, or installer’s bit, to drill up through the ceiling. This bit is 1/16″ x 12″ long. It’s very useful for figuring out where you’ll end up on the other side of a wall or ceiling. In this case, I was hoping that my holes would line up as expected in the attic space. I was pretty sure of my locations because I had been in the attic for some other projects recently.
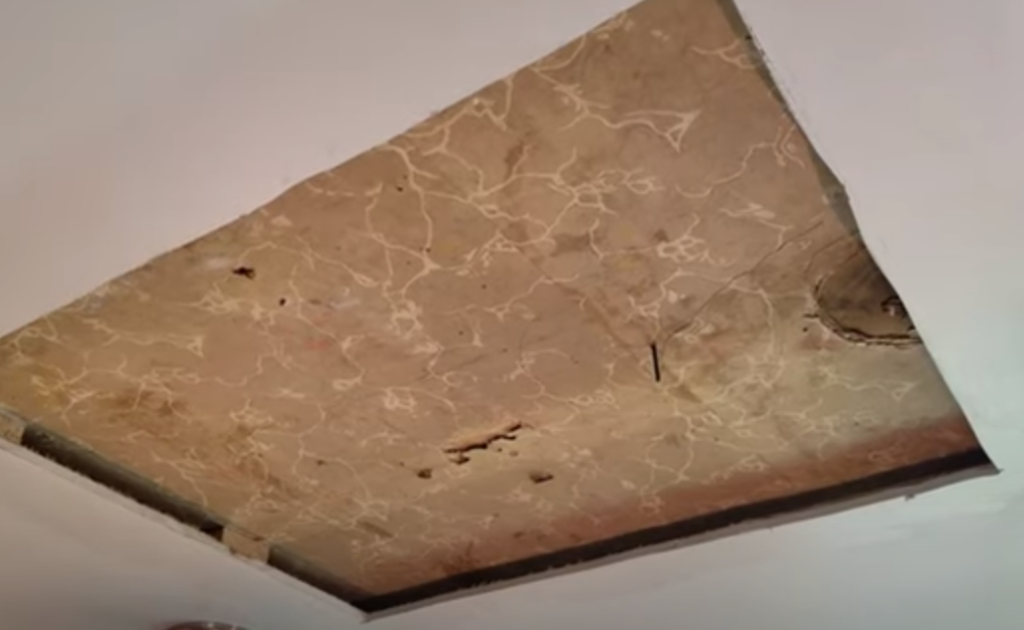
Here’s the bit in the attic, almost exactly where I expected it to be.

I don’t like working in the attic. I know I’ll need to go up there again, but I don’t have to be happy about it. If you can avoid attic work in the summer you definitely should.
I made a scoop out of an old gallon bottle and started moving the insulation out of the area where I needed to work. I didn’t want any of the insulation to fall into our kitchen when I started cutting holes.
I think this is common knowledge, but I feel like I should say it anyway. If you’ve never worked in an attic before you should know that you cannot step on the floor itself. The joists are safe, the “floor” is actually just the ceiling from below and a miss-step will put you right in the room below where you’re working. My attic does have some extra boards for walking in some places. Also, be sure to wear protective equipment like an air filter.
After I confirmed my layout in the attic it was time to start cutting the holes in the pan. I marked the circles for the duct connections, then I used a chisel to punch little slices in the sheet metal, kind of nibbling my way around the circle. I hammered into a scrap block of wood so I wouldn’t damage my table.

I used the pan as a template to transfer the circles onto the ceiling.


Back in my shop, I used water-based duct sealant to attach the take-off connections to the pan. I used a hammer to fold down the tabs nice and tight.


I used an oscillating saw to cut the holes in my ceiling. There was a drop cloth down over the counter to catch dust. This makes a bit of a mess.
After the holes were cut and the pan assembly fit properly I used some screws with washers to attach it to my ceiling. I screwed up into the joists. I also put some screws in the corners. I was lucky here because my ceiling has plywood between the joists and the drywall. This makes for a very secure attachment point. If I didn’t have the plywood I would have used adhesive.

I put the elbow and tee sections of the pipe together in my shop before installing the pan assembly. This made the attic work a little bit easier.

I used lots of foil tape to hold everything together tight.
The in-line blower I selected was mounted on some wood supports that were already in place. My home had a “Whole-House” ventilation system that we disabled because it didn’t work properly. Our old farmhouse is not sealed tight enough to need a fan like this. It was installed as a way of removing excess moisture from the home, but most of the connections had fallen off.

After the blower was mounted, I finish the wiring and connected a backdraft damper to the inlet port. I’m not sure if it matters what side of the blower the damper was attached to. Nobody on reddit mentioned that as a complaint. The purpose of the backdraft damper is to prevent cold air from moving back into the house through the duct lines.
I was able to use some of the wiring from the old fan system to connect this new blower. I routed the wires up to a switch under the counter near the stove.
I connected all the duct lines with flexible duct, which I’ve learned will need to be upgraded in a future project, so I’m not going to go into too much detail here. Essentially, I connected all the duct work and ran it out, through my garage, to a wall vent on the exterior of my house.

I was careful to make sure all the connections were sealed and secure. I don’t want anyone to complain about my work in the future the way I complained about the whole house fan installation in my video.
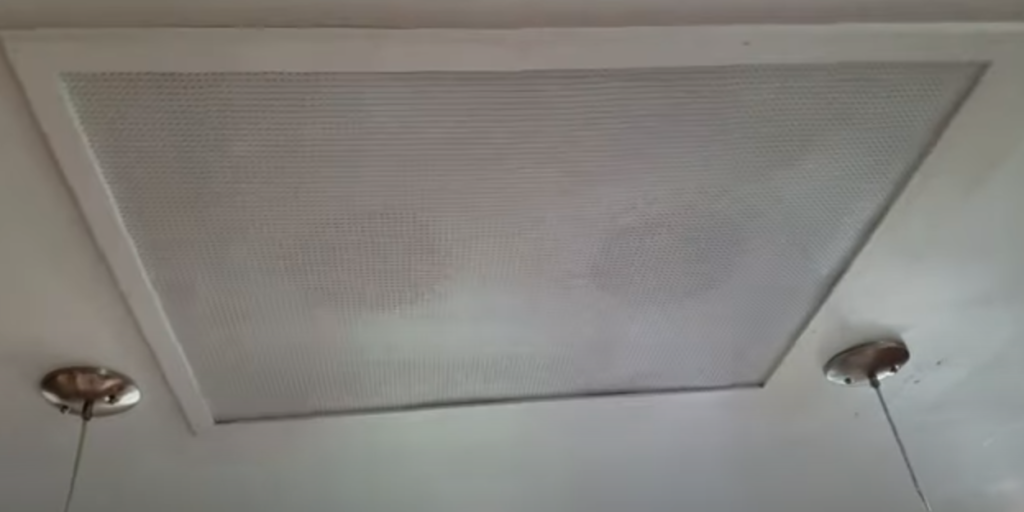
To cover the intake I started by making a very low-profile picture frame. I was going to miter the corners, but I wasn’t sure about my measurements and decided to use glue and butt joints instead.

I didn’t have any clamps long enough for the job, so I screwed some scrap pieces of wood (my test frame pieces) to my table, and wedged the frame tight. I also put some extra wood clamps around the frame to ensure everything dried flat.
I cut the screen to size, glued and stapled it in place, and filled the holes with wood filler.
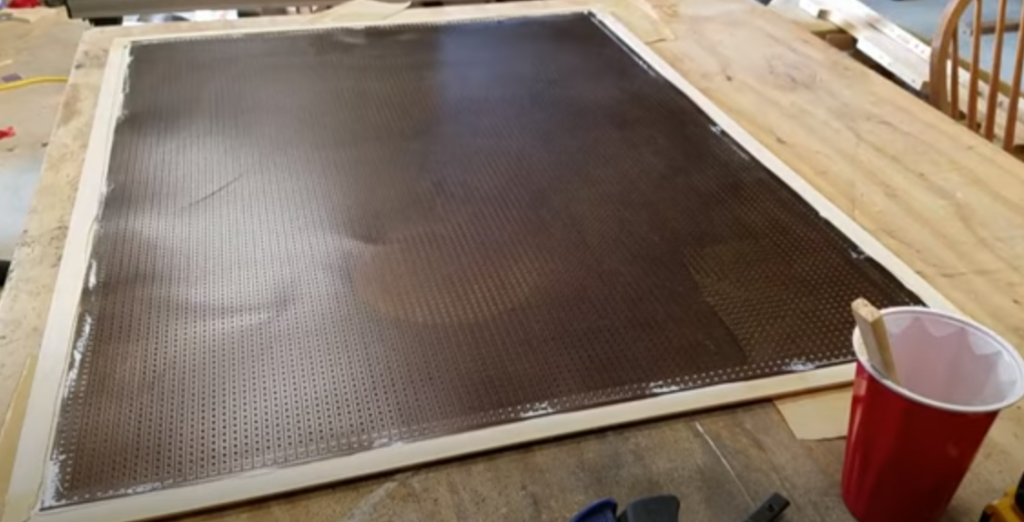
When everything was dry I did some quick sanding then moved on to paint.
I put on a quick primer coat, then three coats of the chosen ceiling color. I painted both sides because I didn’t want the thickness of the metal to be left exposed. In retrospect, this wasn’t necessary. Also, if I were to do this again I would paint the screen before installing it.
The screen is very fragile and dents if you look at it wrong or sneeze nearby, so be extra careful with whatever material you find.
To install the screen I recruited my son and his friend. While they held the screen in place I checked my measurements to make sure it was square to the wall and evenly spaced between the light fixtures.
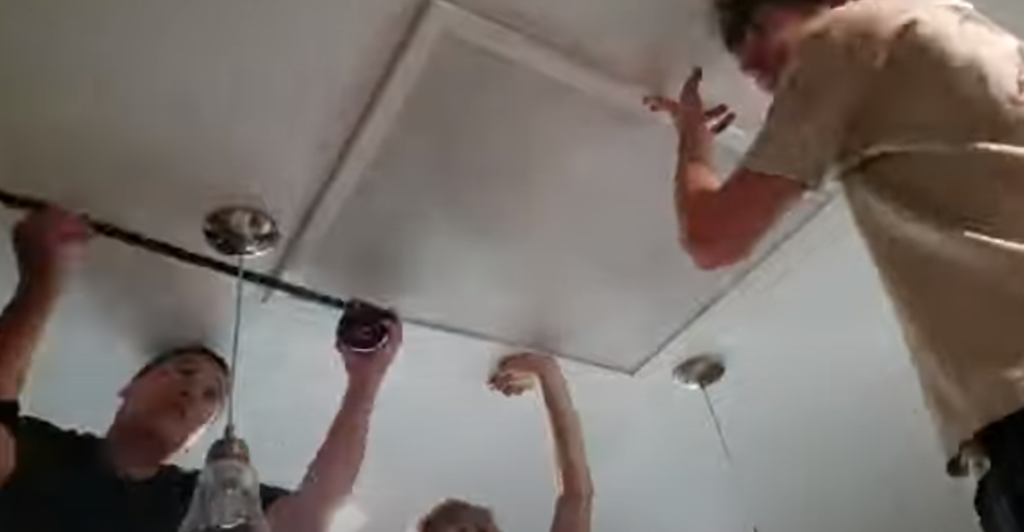
I secured the screen with some finish nails. In the near future, I will change those for some finish screws and install a filter to prevent grease and dust from getting into my duct system.
For as long as this project took, I don’t really think it was that difficult. The hardest part was working in the attic, and getting over the mental block to do that work. If you have any experience with wiring, or basic DIY renovation stuff I think this is a project that you can handle.
Here’s a cost breakdown (at the time of writing, mid-2021):
| 8″ elbow | $20 |
| Venetian Screen | $33 |
| 8″ tee | $43 |
| Insulated Flex Duct | $58 |
| Uninsulated Flex Duct | $25 |
| 8″ Duct Take Off (x2) | $42 |
| Backdraft Damper | $25 |
| Hooded Exterior Wall vent | $63 |
| Water-based sealant | $13 |
| Exterior sealant | $11 |
| Foil tape | $11 |
| Exhaust Fan | $267 |
Altogether, this project cost roughly $611. I also bought some tools that I needed and some poplar for the frame. I only used a little bit of that though.
I hope this was helpful for anyone thinking about adding some kind of vent to their house. Be sure to check local codes, do your research, and be safe. Thanks for reading.
Don
Here’s a list of tools and hardware that I used to make this project happen (affiliate links):
Hardware
Exhaust Fan: https://www.lowes.com/pd/Panasonic-WhisperLine-2-1-Sone-440-CFM-Steel-Bathroom-Fan/1000943032
Venetian Bronze Aluminum Sheet/Screen: https://amzn.to/3BYAoLa
8″ elbow: https://amzn.to/3lf77Gg
8″ tee: https://amzn.to/3BZcSh1
8″ insulated flexible duct:https://amzn.to/379EZvP
8″ uninsulated flexible duct: https://amzn.to/2WCM3PE
8″ take offs: https://amzn.to/3layCAE
8″ take offs: https://amzn.to/3layCAE
Backdraft Damper: https://amzn.to/3j8Kn7Q
Hooded wall vent cover: https://amzn.to/3ldhbiQ
Water based duct sealant: https://amzn.to/3zNuTNi
Exterior silicone sealant: https://amzn.to/2V6ptyn
Foil tape: https://amzn.to/2V9Uq4F
Tools
Snip Set (This is what I should have used for cutting the sheet metal): https://amzn.to/37pathP
Oscillating saw: https://amzn.to/3fdkenr
Wiss 18″ folding tool: https://amzn.to/3ifaIlA
Rivet gun: https://amzn.to/3zW6DIT
Utility knives (these are awesome): https://amzn.to/3rIIXVC
Dust Mask: https://amzn.to/3idrqll
Center punch or awl: https://amzn.to/2UXLOhL
Probe drill bit: https://amzn.to/3C0pu7N
Duct crimping tool: https://amzn.to/3xiVKiK
Weld bond glue: https://amzn.to/3j8RNYQ
Wood filler: https://amzn.to/3zStWDv
